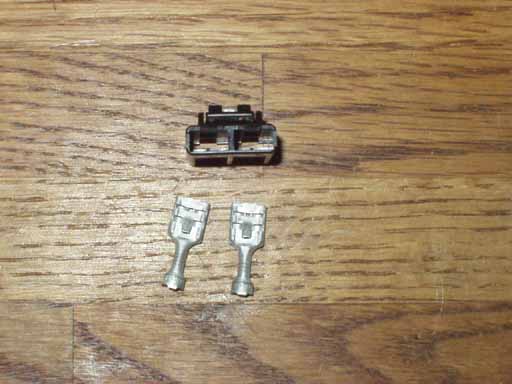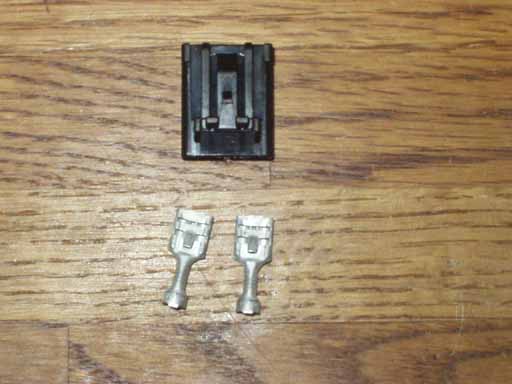
43mm Fuel Pump Retrofit install, late 1989 200T/Q, 1990-91 Audi 200T/QSAFETY WARNINGS: Ignition of the fuel vapor can come from any open flames in a gas water heater or dryer located in your garage, or by any electrical spark. The vehicles battery negative terminal connection should be removed before starting any work, and have a fire extinguisher nearby. DO NOT USE any incandescent light bulbs that could possibly break and ignite the fuel vapor. Do not use any tools that could create a spark and ignite the fuel vapors. Ensure adequate ventilation, as fuel vapors can be toxic. Do not work on your fuel pump with your vehicle located in any enclosed garage or building space. Protective neoprene gloves should be worn that are approved for immersion in gasoline or other solvents. Additional photos of the old style and new style pump are located HERE. Note the direction of the original fuel line before removing on the old 60mm pump, and when installing the new fuel line on the 43mm pump. The New 43mm fuel pump needs to be inserted all the way down into the plastic housing (pin adaptor) so that the pump inlet is exposed out the bottom of the plastic housing (pin adaptor). This is a very tight fit, so you may need to turn the pump upside down and use a deep socket to support the end of the pump over the fuel fitting, while you push down the plastic housing (pin adaptor) down over the pump. The pump with plastic housing (Pin adaptor) and new O-RING is inserted up from the bottom, into the original reservoir housing. NOTE: The plastic housing (Pin adaptor) has a round tab that should be positioned into the corresponding channel in the reservoir when inserting the pump/housing. The original reservoir screen cap should then be twisted and locked into place. The screw type hose clamp should be used to secure the new fuel hose to the new pump output hose fitting AFTER you have installed the pump into the reservoir. This is a tight fit and is tough to get the clamp down around the hose and tightened. Note: The direction of the fuel line is important to avoid getting tangled with the fuel tank sending unit float arm. The new style 43mm fuel pumps will need a new electrical connection. Some of the replacement pumps will be supplied with the new connector and instructions. The latest Bosch replacement 43mm fuel pump uses a 2 terminal black plastic connector housing with locking tang that engages into the fuel pump connector as shown below.
Cut off the original eyelet terminal and strip the insulation off the
Green/Yellow strip wire and crimp on the new terminal using a ratchet
style W crimp tool for Non Insulated Terminals. With the Green/yellow
wire, insert this terminal with wire into the black plastic connector
housing so the terminal will plug into the + side marked
on the new pump. The brown wire with new terminal crimped on, goes into
the opposite hole of the black plastic connector. Note the crimp on
terminals have a “tang” that will lock into the black plastic
connector housing only one way towards the connector locking clip. The
professional ratchet style crimping tool for non insulated terminals
should be used to crimp the new terminals onto the wires. The terms listed on this page are subject to change at any time without prior notice. Copyright © SJM Autotechnik™ , all rights reserved |
| About Us Privacy Policy Terms of Use Links Customer Service Safety Information Home |